Dental Care Guide: Essential Dental Products, Instruments, Materials, Procedures & Clinical Tips

Introduction: Good Dental Care Starts Before the Dental Chair

A healthy smile isn’t created only when a patient sits in a dental chair. It is built through the right combination of preventive products, appropriate clinical instruments, quality dental materials, evidence-based procedures, and consistent home care.

For patients searching for reliable dental care Delhi, the challenge is often not finding a dentist—it is understanding what actually matters during treatment. Why is fluoride important? Which instruments are used for a filling? What makes one restorative material more appropriate than another? And how can a patient recognize a clinic that takes infection control seriously?

FPtnbmV l8Yj5fjS9BvM3Kh bGT6I7uXRkr TR kxP9TcVy Orn99 lc3J6a4vTAinMs0BunG2vDqXKStRfTi FamqcB5qJZ3qukuhMd1GkFxy mYUnCXZIVipUcrZ okCZ75ZnGit4 Ne TGS VeT0 fjxfeVxkxKaVT360AOp9Ry74vRLF6lhmVFw6eMPw?purpose=fullsize

These questions matter because modern dentistry has moved far beyond simply treating tooth pain. The emphasis is increasingly on prevention, early diagnosis, minimally invasive treatment, preservation of natural tooth structure, and long-term maintenance.

The FDI World Dental Federation identifies dental caries and periodontal disease among the major oral diseases and emphasizes prevention through oral hygiene, fluoride, healthy nutrition, early screening, and appropriate intervention.

This guide breaks down the dental ecosystem—from products patients use every day to the instruments and materials professionals rely on in the clinic.


1. Essential Dental Products for Everyday Oral Care

The most sophisticated dental treatment cannot replace consistent daily oral hygiene.

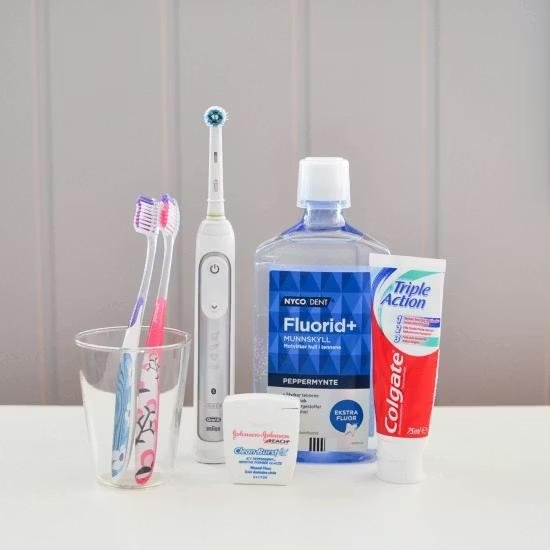
A practical home-care routine generally revolves around four essentials:

  • Fluoride toothpaste
  • Toothbrush
  • Interdental cleaning aids
  • Appropriate mouthwash or other professionally recommended products

Fluoride Toothpaste

Fluoride remains one of the most important preventive tools in dentistry. It helps strengthen enamel and supports remineralization while reducing the risk of dental caries.

The FDI’s 2025 policy statement recommends brushing at least twice daily with fluoridated toothpaste at an appropriate fluoride concentration. It notes that commercially available fluoridated toothpastes should generally contain at least 1000–1100 ppm fluoride, while higher-strength formulations may be recommended for people at elevated caries risk under professional guidance.

Toothbrushes

A toothbrush should provide effective plaque removal without unnecessarily traumatizing teeth or gums.

For many people, a soft-bristled brush is a practical choice. Electric toothbrushes can also be useful, particularly for individuals who struggle with brushing technique or manual dexterity.

The key isn’t buying the most expensive brush. Consistency and technique usually matter more than marketing claims.

Interdental Cleaning

A toothbrush cannot effectively clean every contact area between teeth.

Depending on the patient’s anatomy, a dentist may recommend:

  • Dental floss
  • Interdental brushes
  • Water flossers
  • Specialized cleaning aids for orthodontic appliances or implants

The correct product should be selected according to the patient’s individual needs rather than simply choosing whichever product is most popular.

8ZxiyY LD4kKw0EFlrW8d uUo53KPbPsVLnyxfUPvufvh iCVfNb2xjb6xJt2OSQglWtfw3DGLCHRZkHi0129sbk1WJfWRe Ze6C3iSWHfD8ccpsjZ42I69rwZMs2VRRrGCdfFu3HveDTL23fG9Jg6EjSCbgdV oP61 Ax v04XJW8qvZLQW4Pu8Im7ipJtx?purpose=fullsize

2. Dental Products vs Dental Instruments: What’s the Difference?

One of the easiest ways to understand dentistry is to separate consumer dental products from professional dental instruments.

CategoryExamplesPrimary Purpose
Preventive productsToothpaste, toothbrushes, flossDaily oral hygiene
Diagnostic instrumentsMouth mirrors, probes, explorersExamination and diagnosis
Periodontal instrumentsScalers, curettesPlaque and calculus removal
Restorative instrumentsExcavators, condensers, matricesFilling procedures
Endodontic instrumentsFiles, reamers, spreadersRoot canal treatment
Surgical instrumentsElevators, forceps, surgical instrumentsOral surgery
Rotary instrumentsBurs, handpiecesCutting, shaping and finishing
Infection-control productsSterilization pouches, barriers, disinfectantsSafe clinical workflow

This distinction is important when selecting products for a dental clinic. A product that looks inexpensive at purchase may become costly if it wears quickly, requires complicated maintenance, or disrupts clinical workflow.


3. Essential Dental Instruments Every Clinic Uses

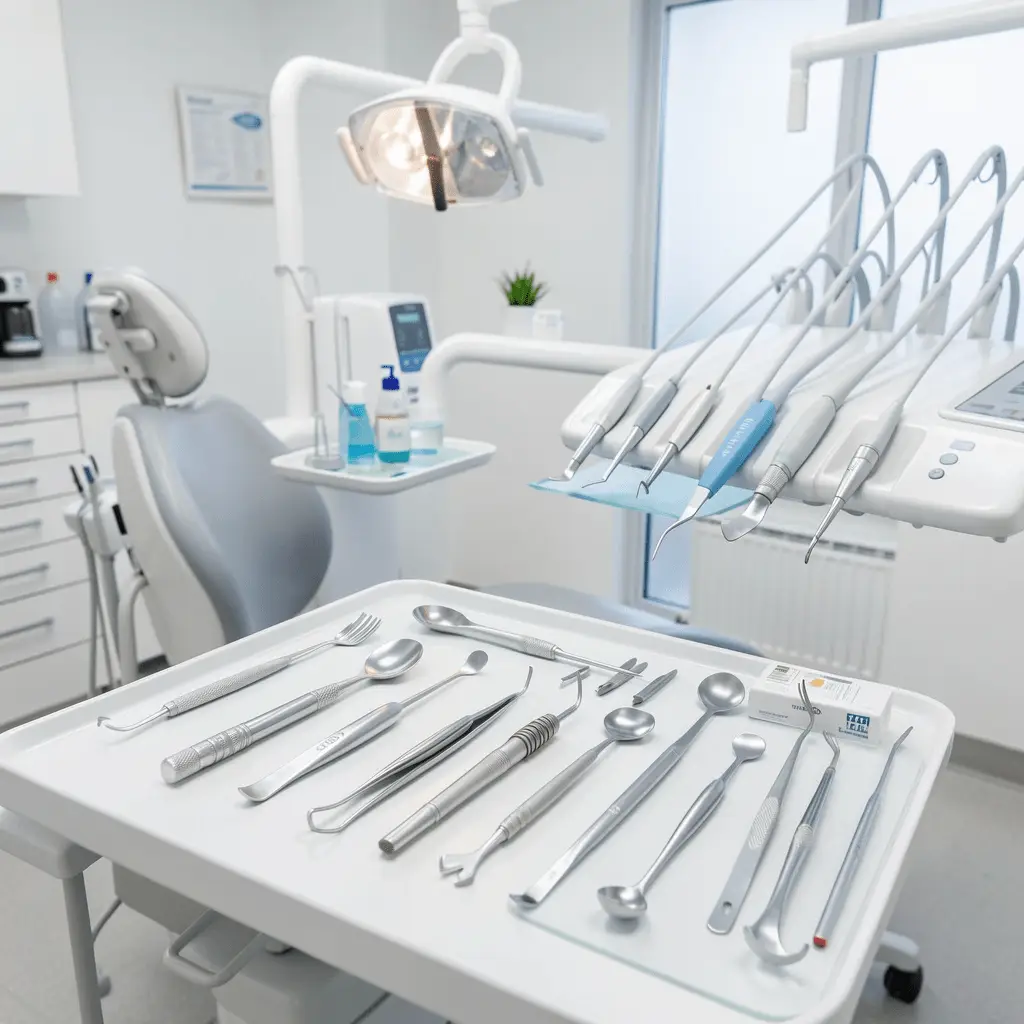
Dental instruments are not simply collections of metal tools. Each instrument is designed around a particular clinical task.

Diagnostic Instruments

Basic examination commonly involves instruments such as:

  • Mouth mirrors
  • Explorers or probes
  • Periodontal probes
  • College tweezers
  • Diagnostic rulers and measuring aids

These tools help the clinician visualize difficult areas, evaluate tooth surfaces, assess periodontal tissues, and identify abnormalities.

Clinical Tip

Instrument selection should be based on ergonomics, visibility, precision, durability and maintenance, not just price.

An instrument that causes hand fatigue during repeated procedures can affect both clinician comfort and workflow.


Periodontal Instruments

Periodontal instruments are designed to assess and manage the tissues surrounding teeth.

Common examples include:

  • Periodontal probes
  • Universal curettes
  • Gracey curettes
  • Ultrasonic scaler tips
  • Periodontal explorers

Scaling and root debridement require controlled instrumentation. Using the correct instrument design for the treatment area can improve access and reduce unnecessary tissue trauma.


Restorative Instruments

Restorative dentistry relies on instruments that help the dentist remove diseased tooth structure, place materials, shape restorations and finish surfaces.

Examples include:

  • Excavators
  • Composite placement instruments
  • Condensers
  • Burnishers
  • Matrix systems
  • Wedges
  • Carvers
  • Finishing and polishing instruments

For composite restorations, accessories such as matrices, wedges, bonding systems, curing lights and finishing discs can have a major impact on the final result.


4. Dental Materials: Choosing the Right Material for the Right Job

Modern dentistry offers an extensive range of materials. The best choice depends on factors such as tooth location, functional load, aesthetics, moisture control, patient risk and clinical objectives.

Common Dental Materials

MaterialCommon ApplicationKey Consideration
Composite resinTooth-colored restorationsAesthetics and technique sensitivity
Glass ionomer cementRestorations, liners, lutingFluoride release and chemical adhesion
Resin-modified GICRestorative/luting applicationsCombination of useful GIC and resin properties
Dental adhesivesBonding restorative materialsProper isolation and application
Impression materialsDental impressionsAccuracy and dimensional stability
Temporary materialsProvisional restorationsEase of placement and removal
Luting cementsCrowns, bridges, indirect restorationsRetention and compatibility
Endodontic sealersRoot canal obturationSealing the prepared canal system

The important lesson is that there is no universally “best” dental material.

A material appropriate for a low-stress cervical restoration may not be the ideal choice for a heavily loaded posterior tooth. Likewise, a material selected for temporary treatment should not automatically be considered suitable for definitive restoration.

Iy61M1wHyemWsEYpIyB7xdYWUtF4uVk7YyBw t7Ttx2BOaXjQGy7ryN hyM Yl97azsQn3tx2ROcNUXVtJOyfK0TSB7f0KX11LCckzwrkHmUuDW emSeMfH8OoiidJYiW3gRNk7a UPewKu7hrc6KLr0UpCNysX3gs8upRHkVnyJYQzcaZmIQtUgXJ1fRqUX?purpose=fullsize

5. Common Dental Procedures and the Products Behind Them

Understanding procedures becomes easier when you see the relationship between the treatment and the products used.

Dental Cleaning and Scaling

Professional cleaning may involve:

  • Ultrasonic scalers
  • Hand scalers
  • Curettes
  • Prophy cups
  • Polishing pastes
  • Suction systems

The objective is to remove deposits that routine brushing cannot adequately eliminate.

Dental Fillings

A typical direct restoration may involve:

  1. Examination and diagnosis
  2. Local anesthesia when required
  3. Isolation
  4. Removal or management of diseased tissue
  5. Conditioning or bonding
  6. Placement of restorative material
  7. Light curing where applicable
  8. Finishing and polishing
  9. Occlusal adjustment

The quality of the final restoration depends on more than the filling material itself. Isolation, bonding technique, cavity preparation, finishing and occlusal adjustment all contribute to clinical success.

Root Canal Treatment

Endodontic treatment commonly requires:

  • Endodontic files
  • Apex locator
  • Irrigation system
  • Rubber dam
  • Rotary or reciprocating instruments
  • Paper points
  • Gutta-percha
  • Endodontic sealer
  • Obturation instruments

The purpose is to clean, shape and seal the root canal system while preserving the remaining tooth structure.


6. Infection Control: The Most Important “Invisible” Dental Product

Patients may notice a new dental chair or sophisticated equipment, but one of the most important parts of a modern clinic is often invisible: infection prevention and control.

The CDC classifies dental instruments according to their potential infection-transmission risk. Critical instruments that penetrate soft tissue or bone should be heat sterilized after each use or discarded. Most heat-tolerant semicritical instruments should also undergo heat sterilization.

Standard precautions include:

  • Hand hygiene
  • Appropriate personal protective equipment
  • Safe injection practices
  • Sharps safety
  • Sterile instruments
  • Cleaning and disinfection of clinical surfaces

What Should a Patient Look For?

A professionally managed clinic should have a clear workflow separating contaminated instruments from clean and sterile instruments.

The CDC recommends that instruments are properly cleaned before sterilization and that manufacturer instructions for reprocessing are followed. Wet or compromised sterilization packaging should not be treated as safely sterile.

The ADA also emphasizes sterilizer monitoring as an essential part of an effective infection-control program.

Fresh instruments are not necessarily sterile instruments. A controlled sterilization process is what matters.


7. Dental Equipment That Supports Better Clinical Care

Beyond hand instruments and consumables, dental practices depend on equipment that improves precision, visibility and workflow.

Important categories include:

  • Dental chairs
  • Dental delivery systems
  • LED operating lights
  • Dental handpieces
  • Air compressors
  • Suction systems
  • Ultrasonic scalers
  • Curing lights
  • Intraoral cameras
  • Digital radiography systems
  • Autoclaves
  • Ultrasonic cleaners
  • Amalgam separators where applicable
  • Dental laboratory equipment

Digital technology is particularly valuable for documentation and communication. Intraoral photography and digital imaging can help clinicians explain findings to patients more clearly.


8. How to Choose Dental Products for a Clinic

For clinic owners, buying dental products should not be treated as a simple price comparison.

Use a five-point evaluation:

1. Clinical suitability

Does the product actually match the procedure and patient population?

2. Quality and consistency

Are manufacturing standards, specifications and batch information clearly available?

3. Ergonomics

Will the instrument or device make clinical work easier and more comfortable?

4. Sterilization and maintenance

Can reusable instruments withstand the required processing cycle? Always follow the manufacturer’s validated instructions.

5. Total cost of ownership

Consider more than purchase price.

Total cost = purchase price + maintenance + consumables + replacement frequency + downtime + training

A slightly more expensive instrument that lasts substantially longer may be more economical over its useful life.


9. A Practical Dental Care Routine for Patients

A simple daily routine can prevent many avoidable oral-health problems.

Morning

  • Brush with fluoride toothpaste.
  • Clean the tongue if appropriate.
  • Follow any dentist-prescribed oral-care routine.

During the Day

  • Limit frequent sugary snacks and drinks.
  • Drink water regularly.
  • Avoid using teeth as tools to open packages or containers.

Night

  • Brush thoroughly before sleeping.
  • Clean between teeth using the method recommended for you.
  • Use prescribed fluoride or therapeutic products when indicated.

The FDI emphasizes reducing excessive sugar exposure, regular plaque removal, fluoride toothpaste and professional dental check-ups as key strategies for preventing dental caries.


10. Clinical Tips That Make a Real Difference

Some of the most useful dental-care lessons are surprisingly simple.

Tip 1: Don’t Buy Materials in Isolation

A restorative material should be evaluated together with its adhesive system, curing protocol, instruments and finishing system.

Tip 2: Follow the Manufacturer’s Instructions

Dental materials and equipment are engineered around specific handling and processing conditions. Deviating from those instructions can compromise performance.

Tip 3: Prioritize Isolation

Moisture control is particularly important in procedures where bonding or material placement depends on a controlled field.

Tip 4: Build Standardized Instrument Sets

Organizing instruments into procedure-specific trays can reduce setup time, improve consistency and make inventory management easier.

Tip 5: Treat Sterilization as a Workflow

Cleaning, packaging, sterilization, monitoring and storage are connected steps—not separate tasks.

Tip 6: Choose Prevention Over Repair

The best dental procedure is often the one that can be avoided through early detection, fluoride exposure, good hygiene, diet management and regular professional care.


11. Dental Care Delhi: What Should Patients Prioritize?

For anyone comparing options for dental care Delhi, location alone should not be the deciding factor.

Instead, consider whether the clinic demonstrates:

  • Transparent treatment explanations
  • Appropriate diagnostic procedures
  • Modern infection-control practices
  • Proper instrument sterilization
  • Quality dental materials
  • Clear treatment plans
  • Appropriate follow-up
  • Patient education
  • Evidence-based preventive care

A modern-looking clinic is helpful, but clinical quality is ultimately about systems, people, protocols and consistency.


Key Takeaways

What to EvaluateWhy It Matters
Fluoride toothpasteHelps prevent and manage dental caries
Interdental cleaningReaches areas a toothbrush misses
Quality instrumentsSupports precision and ergonomics
Appropriate materialsMatches restoration to clinical need
Digital diagnosticsSupports visualization and documentation
SterilizationReduces infection-transmission risk
Preventive careReduces future treatment burden
Regular check-upsSupports early detection

Conclusion: Better Dental Care Is a System, Not a Single Product

From a basic toothbrush to an advanced digital imaging system, every dental product has a role—but no individual product can guarantee good oral health.

The real difference comes from how products, instruments, materials and clinical procedures work together.

For patients seeking dental care Delhi, the smartest approach is to look beyond advertisements and focus on evidence-based care, qualified professionals, appropriate diagnosis, infection control and long-term prevention.

For dental clinics, the same principle applies: buy for clinical purpose, evaluate total value, standardize workflows and never compromise on infection prevention.

Good dentistry isn’t simply about having more equipment. It is about using the right product, with the right technique, for the right patient, at the right time.

Ready to improve your dental-care routine?

Whether you’re a patient building a better oral-health routine or a dental professional evaluating products and equipment for your clinic, start with the fundamentals: prevention, quality, safety and evidence-based treatment.

Explore your dental-care options, compare clinically relevant products, and speak with a qualified dental professional before beginning treatment. A small improvement in daily oral care today can prevent a much larger intervention tomorrow.

Leave a Reply

Your email address will not be published. Required fields are marked *

Related Post

SunriseHospitalTour013118 004 1536x1001 1

How to Compare Medical Equipment Before Buying: A Complete Buyer’s Guide

Buying medical equipment is rarely as simple as choosing the model with the lowest price or the longest list of features. A device may look impressive on paper yet prove difficult to maintain, expensive to operate, or poorly suited to your clinic’s workflow. The smarter approach is to compare Medical Equipment as a complete investment—not just a product. Whether you are setting up a new clinic, upgrading a hospital department, replacing an outdated device, or expanding your diagnostic capabilities, the right comparison process can protect your budget while improving patient care. The World Health Organization (WHO) recommends considering technical specifications before purchasing medical devices because good specifications support appropriate selection, implementation, maintenance, and eventual decommissioning. This guide explains exactly what to compare, what questions to ask suppliers, and which seemingly small details can make a major difference after the purchase. Why Comparing Medical Equipment Matters Two machines can perform the same basic function but deliver very different ownership experiences. Consider two patient monitors. One costs less initially, but its sensors are proprietary, replacement parts take weeks to arrive, and staff require extensive training. The second costs slightly more but uses readily available accessories, has local technical support, and requires less downtime. Which one is cheaper? The answer may change completely once you consider its entire operating life. WHO’s current health-technology-management guidance treats equipment management as a lifecycle process extending from needs assessment and procurement through inspection, training, maintenance, and decommissioning. That is why a good comparison should evaluate: Step 1: Start With the Clinical Need—not the Brand One of the most common purchasing mistakes is starting with a product catalogue. Instead, begin with the question: “What problem are we trying to solve?” For example, a small outpatient clinic may need a compact, reliable vital-signs monitor. A large hospital may prioritize connectivity, continuous monitoring, data integration, and high patient throughput. Before comparing brands, write down: WHO’s procurement guidance emphasizes needs assessment and defining minimum performance and operational requirements before selecting specific products. This simple change prevents a surprisingly expensive mistake: buying technology because it is impressive rather than because it is necessary. Step 2: Create a Technical Comparison Sheet Never compare equipment from memory. Create one standardized specification sheet and ask every supplier to complete the same fields. This makes differences much easier to identify. Comparison Factor What to Check Why It Matters Intended use Clinical applications Prevents buying unsuitable equipment Accuracy Measurement accuracy and tolerance Directly affects clinical decisions Capacity Patients/tests per hour Determines workflow efficiency Dimensions Size and footprint Ensures adequate space Power Voltage, consumption, backup requirements Important for installation and continuity Connectivity USB, Ethernet, Wi-Fi, HL7 or other interfaces Supports data integration Consumables Type, availability, cost Influences recurring expenses Maintenance Preventive maintenance requirements Helps predict downtime Warranty Duration and coverage Reduces financial risk Service Response time and technician availability Critical when equipment fails Training Included training and materials Supports safe operation Expected lifespan Manufacturer guidance Helps calculate long-term value The goal is not to find the product with the longest specification sheet. It is to find the equipment whose specifications best match your actual clinical environment. Step 3: Look Beyond the Purchase Price The purchase price is only the beginning. A more useful calculation is Total Cost of Ownership (TCO). A simple TCO formula Total Cost of Ownership = Purchase Price + Installation + Training + Consumables + Maintenance + Repairs + Software/Service Fees − Residual Value For example, suppose: At first glance, Equipment A looks like the obvious choice. But if A requires expensive consumables and frequent servicing while B has lower operating costs and better local support, B could become the more economical option over five years. WHO procurement guidance specifically notes that the most economically advantageous purchase is not necessarily the lowest tender price; delivery, installation, commissioning, training, warranty, and after-sales service also matter. The cheapest machine is not necessarily the cheapest machine to own. Step 4: Compare Quality, Safety and Compliance Price and features should never outrank patient safety. Ask suppliers for documentation demonstrating that the equipment meets the regulatory and quality requirements applicable to your market and intended use. Depending on the product and jurisdiction, this may include: For manufacturers, ISO 13485 is an internationally recognized quality-management standard specifically addressing medical devices. ISO says the standard helps organizations consistently provide medical devices and related services that meet customer and regulatory requirements. However, certification should be treated as one part of due diligence, not as an automatic guarantee that a particular model is perfect for your facility. Always verify the specific product, manufacturer, regulatory status, and documentation. Step 5: Compare Usability—Because Staff Time Has a Cost A technically advanced device can become a poor investment if staff struggle to operate it. Ask your clinical team to evaluate the equipment directly whenever possible. Look at: A useful test is to ask an actual operator to perform a typical procedure without assistance. Watch where they hesitate. Those moments are valuable purchasing information. A machine that saves 30 seconds per patient may not sound revolutionary. But at 40 patients per day, that becomes 20 minutes every day. Over hundreds of working days, small workflow improvements can become significant. Step 6: Investigate Maintenance and Service Support This is where many purchasing decisions go wrong. Equipment does not become valuable merely because it works on installation day. It must continue working reliably months and years later. WHO describes maintenance as including performance inspections, safety inspections, preventive maintenance, and corrective maintenance. Preventive maintenance is intended to extend equipment life and reduce failures. Before buying, ask: Service questions A supplier who gives vague answers before the sale may not become more responsive after it. Step 7: Compare Consumables and Accessories Sometimes the machine is affordable because the recurring products are expensive. Check every item needed to operate the equipment: Then ask whether those items are proprietary or compatible with standardized alternatives. A device requiring a ₹500 consumable for every procedure can become dramatically more expensive than a machine using a

6983515bad2f1546927f65f9 6841b655182dca1cbca49add image1 1

Essential Medical Supplies Every Clinic Should Stock: A Practical Guide for Safer, Smarter Care

Introduction: The Right Supply Can Change the Entire Clinical Workflow Imagine a patient arrives with a minor wound. The clinician is ready, the examination room is prepared, and the diagnosis takes only a few minutes. Then someone realizes the clinic has run out of sterile gauze. It sounds like a small problem. In practice, it can interrupt treatment, delay the next appointment, create unnecessary stress, and compromise workflow. That is why essential medical supplies are not simply items stored in cupboards. They are part of a clinic’s patient-safety infrastructure. A well-stocked clinic does not necessarily have the largest inventory. It has the right products, in appropriate quantities, available when and where they are needed. The World Health Organization (WHO) notes that equipment selection should reflect the facility, available workforce, and local disease burden rather than relying on one universal list. This guide explains what most outpatient and primary-care clinics should consider stocking, how to prioritize purchases, and how to avoid the common mistake of confusing more inventory with better preparedness. What Counts as Essential Medical Supplies? The exact requirements depend on the clinic’s specialty, patient volume, procedures, and local regulations. A general outpatient clinic will have different needs from a dental practice, dermatology clinic, emergency centre, or women’s health facility. However, most clinics can organize their core inventory into several practical groups: This category-based approach is more useful than simply creating a huge shopping list. 1. Infection Prevention and PPE: The First Line of Protection If there is one category a clinic should never treat as an afterthought, it is infection-control supplies. CDC Standard Precautions apply to all patient care and include hand hygiene, appropriate PPE, environmental cleaning, injection safety, and proper handling of reusable equipment. Essential items include: Hand hygiene products deserve special attention. WHO’s “Five Moments for Hand Hygiene” framework emphasizes cleaning hands before patient contact, before aseptic procedures, after body-fluid exposure, after patient contact, and after touching the patient’s surroundings. Practical insight: Do not store sanitizer only at a central nursing station. Put hand-hygiene supplies where clinical decisions happen—near examination areas, treatment rooms, and other points of care. 2. Examination and Diagnostic Supplies A diagnosis begins with good information. Even sophisticated clinical knowledge is limited when basic examination equipment is missing or unreliable. A general clinic should consider maintaining: For frequently used diagnostic equipment, having a backup can be more valuable than purchasing an expensive device that is rarely used. A simple comparison Supply Primary purpose Stock priority Key consideration BP monitor Blood-pressure assessment High Correct cuff sizes Pulse oximeter Oxygen saturation High Accuracy and battery life Thermometer Temperature High Easy cleaning Stethoscope Cardiopulmonary assessment High Durability and acoustics Glucometer Blood glucose testing Medium–High Strip compatibility Examination light Visual examination Medium Brightness and positioning Otoscope Ear examination Specialty-dependent Disposable/reusable tips The important point is that equipment availability should match the clinical services actually offered. WHO similarly emphasizes that medical-device selection should be based on local requirements rather than assuming a universal equipment package. 3. Injection and Medication-Administration Supplies Injection-related products require particularly careful inventory control because availability and infection prevention are closely connected. Common supplies include: Safety is more important than simply buying in bulk. CDC injection-safety guidance states that single-dose vials should not be used for more than one patient, and contaminated or questionable vials should be discarded. Likewise, used sharps should be placed in appropriate puncture-resistant containers rather than being handled casually after use. Inventory lesson: The cheapest syringe is not necessarily the lowest-cost option if poor packaging, inconsistent quality, or unreliable availability creates waste or clinical risk. 4. Wound-Care Supplies Cuts, abrasions, punctures, minor burns, postoperative wounds, and dressing changes are common reasons patients require basic treatment. A clinic’s wound-care stock may include: Instead of keeping one enormous assortment, clinics should analyze the wounds they actually treat. For example, a dermatology clinic may consume more small dressings and sterile swabs, while an urgent-care facility may need a broader range of trauma-related products. 5. Emergency and First-Response Supplies Even a routine outpatient clinic can encounter a medical emergency. The emergency stock should be determined by the clinic’s services, staffing, local protocols, and applicable regulations. Depending on the setting, this may include: The important principle is readiness, not decoration. An emergency trolley filled with expired products or equipment that staff have never practiced using is not a prepared emergency system. Every clinic should periodically verify: 6. Specimen Collection and Point-of-Care Testing Clinics that perform laboratory testing or collect specimens need a separate inventory category. Depending on services, this may include: One frequently overlooked item is labeling material. A test cannot be managed safely if the specimen is collected correctly but identification is incomplete or inaccurate. Therefore, labels, markers, requisition forms, and specimen bags should be treated as clinical supplies—not office stationery. 7. Cleaning, Disinfection and Medical Waste Supplies Clinical inventory does not end at the examination table. Cleaning and waste-management supplies help maintain a safe environment between patients. CDC guidance emphasizes cleaning and disinfecting patient-care environments and ensuring appropriate PPE for cleaning activities. Clinics should assess their need for: The goal is not merely to make rooms look clean. Frequently touched surfaces close to patients can become contaminated and require appropriate cleaning and disinfection. 8. How Much Should a Clinic Keep in Stock? This is where many inventory systems go wrong. Buying six months’ worth of everything may sound safe, but excessive inventory can create expired products, tied-up capital, storage problems, and hidden waste. A better approach is to divide products into three groups: Stock level Examples Suggested approach Critical Gloves, syringes, gauze, hand hygiene products Maintain safety stock Routine Dressings, tapes, examination consumables Reorder based on usage Specialty Procedure-specific products Stock according to scheduled demand A useful starting point is to calculate average monthly consumption and establish a reorder point based on supplier lead time plus a safety buffer. For example: Reorder Point = Average Daily Usage × Supplier Lead Time + Safety Stock This turns inventory management from guesswork into a measurable process.

Basic Dental Instruments Used in Every Clinic

10 Essential Dental Instruments Every Dental Clinic Should Have

A dental clinic can have the latest chair, impressive technology, and a beautifully designed reception area—but when treatment begins, success often comes down to something much simpler: the instruments in the dentist’s hands. The right Essential Dental Instruments improve visibility, precision, efficiency, patient comfort, and infection control. More importantly, a well-planned instrument setup prevents a common clinic problem: buying too many specialized tools while overlooking the everyday instruments used in almost every appointment. Whether you are opening a new dental practice, upgrading an established clinic, or building an inventory system for dental supplies, the goal should not be to own the largest collection. It should be to have the right instruments, in the right quantities, with a reliable sterilization and maintenance workflow. The following 10 instruments form a practical foundation for general dentistry. What Makes a Dental Instrument “Essential”? Before looking at individual instruments, it helps to define what “essential” actually means. An instrument deserves a place in the core inventory when it is: Infection prevention is particularly important. The CDC classifies patient-care items according to their intended use and infection-transmission risk. Critical and semicritical instruments generally require appropriate sterilization or high-level processing according to their classification and manufacturer instructions. That means purchasing an instrument is only half the decision. How that instrument will be processed after every patient matters just as much. 10 Essential Dental Instruments for a General Dental Clinic 1. Dental Mouth Mirror The mouth mirror is one of the simplest instruments in dentistry—and one of the most frequently used. It provides indirect vision, helps retract the cheek or tongue, reflects light into difficult-to-see areas, and can assist with examination of tooth surfaces. A good mouth mirror should offer: For a busy practice, having several mirror handles and replacement mirror heads can be more practical than maintaining only a small number of sets. Buying insight: Don’t judge mirrors purely by price. Poor-quality reflective surfaces or loose mirror heads can become frustrating during routine examinations. 2. Dental Explorer or Probe A dental explorer is designed for tactile examination of teeth and surrounding structures. Different probe designs are used for different clinical purposes. Common examples include explorers for general examination and periodontal probes for assessing periodontal pocket depths. A probe should have a comfortable grip and a properly finished working end. Excessively sharp or damaged instruments should not remain in circulation. Best practice: Inspect probes regularly for bent tips, corrosion, or damage. A small defect can affect tactile sensitivity and clinical accuracy. 3. College Tweezers / Dental Cotton Pliers Dental tweezers may look basic, but they perform countless small tasks throughout the day. They can be used to: Their value is largely about efficiency. When an assistant or dentist repeatedly needs to pick up a small item, reliable cotton pliers save time and reduce unnecessary hand movements. For clinics managing multiple treatment rooms, these instruments are inexpensive enough to stock in adequate numbers. 4. Dental Excavator Excavators are commonly associated with removal of softened carious dentin and other procedures where controlled removal of material is required. Different shapes and sizes provide different working angles and access. A good excavator should have: Although rotary instrumentation has transformed restorative dentistry, hand instruments remain valuable when tactile control and selective removal are important. 5. Dental Scaler Scalers are essential for removing calculus and deposits during periodontal and preventive procedures. There are several designs, including instruments intended for specific tooth surfaces and areas of the mouth. This is an area where instrument selection should match the clinician’s technique rather than simply choosing the largest possible set. The CDC considers periodontal scalers among critical instruments because certain instruments can penetrate tissue or contact bone, meaning appropriate sterilization is essential. Inventory tip: Keep periodontal instruments organized by design and procedure. A well-labeled instrument cassette can make setup significantly faster. 6. Dental Curette Curettes are particularly important in periodontal therapy because their rounded working ends are designed for subgingival instrumentation. Universal and area-specific curettes serve different purposes, so a periodontal practice may require a broader selection than a general dental clinic. When purchasing curettes, pay attention to: Ergonomics deserve special attention here. An instrument that feels acceptable for five minutes may become uncomfortable during a long periodontal procedure. 7. Dental Handpiece If the mouth mirror is one of dentistry’s simplest tools, the handpiece is one of its most technologically important. High-speed and low-speed handpieces are used for procedures ranging from tooth preparation and caries removal to finishing and polishing. Important buying factors include: The CDC and ADA emphasize that reusable dental handpieces should be appropriately cleaned and heat sterilized between patients when applicable, following validated manufacturer instructions. This is one reason a clinic should never purchase a handpiece solely because it is inexpensive. Reprocessing requirements should be part of the purchasing decision from day one. 8. Dental Extraction Forceps For clinics performing routine extractions, extraction forceps are indispensable. Their designs vary according to tooth type, location, and clinical application. Because different teeth require different approaches, a clinic should build its forceps inventory around the extractions it actually performs. A practical starter inventory may include forceps suitable for: Forceps should provide a secure grip without excessive hand strain. Important: Extraction instruments are considered critical patient-care items because they can penetrate soft tissue or contact bone. Appropriate cleaning and sterilization are therefore essential. 9. Dental Elevators Elevators are commonly used during tooth extraction to loosen teeth or roots and assist in creating controlled mobility before forceps application. Straight and angled designs are available, with different sizes and shapes serving different clinical situations. A useful elevator should have: Because elevators can transmit substantial force, quality matters. A poorly manufactured instrument can bend, chip, or become difficult to control. 10. Air-Water Syringe The air-water syringe is sometimes overlooked when clinics create instrument inventories because it is integrated into many dental units. Yet its role is fundamental. It helps clinicians: Tips and removable components must be handled according to the manufacturer’s reprocessing instructions. Dental devices connected to air and water